Showing posts with label Low Fat. Show all posts

Monday, April 30, 2012

Green Diva Dip

There are a lot of recipes floating around right now for sweet pea guacamole or green pea hummus - both featuring a mush-prone vegetable to put some spring into a dish. Though I don't typically like following blog trends, I do like coming up with quick snacks when I'm low on exciting groceries. In this instance, we were heading poolside and feeling munchy, but I didn't have legumes for hummus or chips for dipping. What I had were crisp vegetables, leafy greens, and frozen peas.

Another fantastic result of a clean-out-the-fridge hodgepodge. With frozen peas and edamame always on hand, I had a good base. I'm also going through a juicing phase and have a lot of greens (chard, beet greens, kale and spinach). While we typically juice greens or use them in salads, why not puree them raw? They are tender and breakdown easily, and it's such an easy way to sneak in an extra nutrient punch. Then I started looking for anything green and delicious in the fridge. Thus arose a beautiful and bright concoction.

We agreed as taste testers that something is only considered a "concoction" until it has a name. "Green Goddess" is an overused title for a green dressing, green smoothies, or green liquid anything. Yet with my token male out of town this weekend, the last 3 days have been jam packed with lady fun. So we came upon this title to embody our energizing female connections over the past few risings and settings of the moon - 2 of which featured this dip.

Cooking note: if you don't have white miso or reduced fat Veganaise (or any kind of Veganaise), this dip will still be delicious. Just add a little more avocado and salt.

Green Diva Dip
Makes about 1 1/2 cups
Prep time: 5-10 minutes

Ingredients

1 c. frozen peas, thawed
1/2 c. edamame
1/4 avocado
1/4 small lemon, peeled (flesh and all, but no rind)
2 large scallions, white and green parts chopped
1/4 c. parsley
1-2 small garlic cloves, sliced
2 tsp. white miso paste (optional)
1 tsp. dried basil or 1 T. fresh basil
1/4 - 1/3 c. veggie broth
2 c. spinach
1/2 T. Reduced Fat Veganaise (optional)
Salt and pepper to taste

Sliced vegetables for dipping

Directions

Combine the first 9 ingredients in a food processor and puree. Slowly pour in broth through the chute until the mixture processes smoothly, without chunking up. Once the mixture is well pureed, add spinach and Veganaise (if using). Process for another 3-4 minutes or until smooth.

Serve with slice zucchini, jicama, carrots, radishes, cucumber, or celery.

Sunday, April 8, 2012

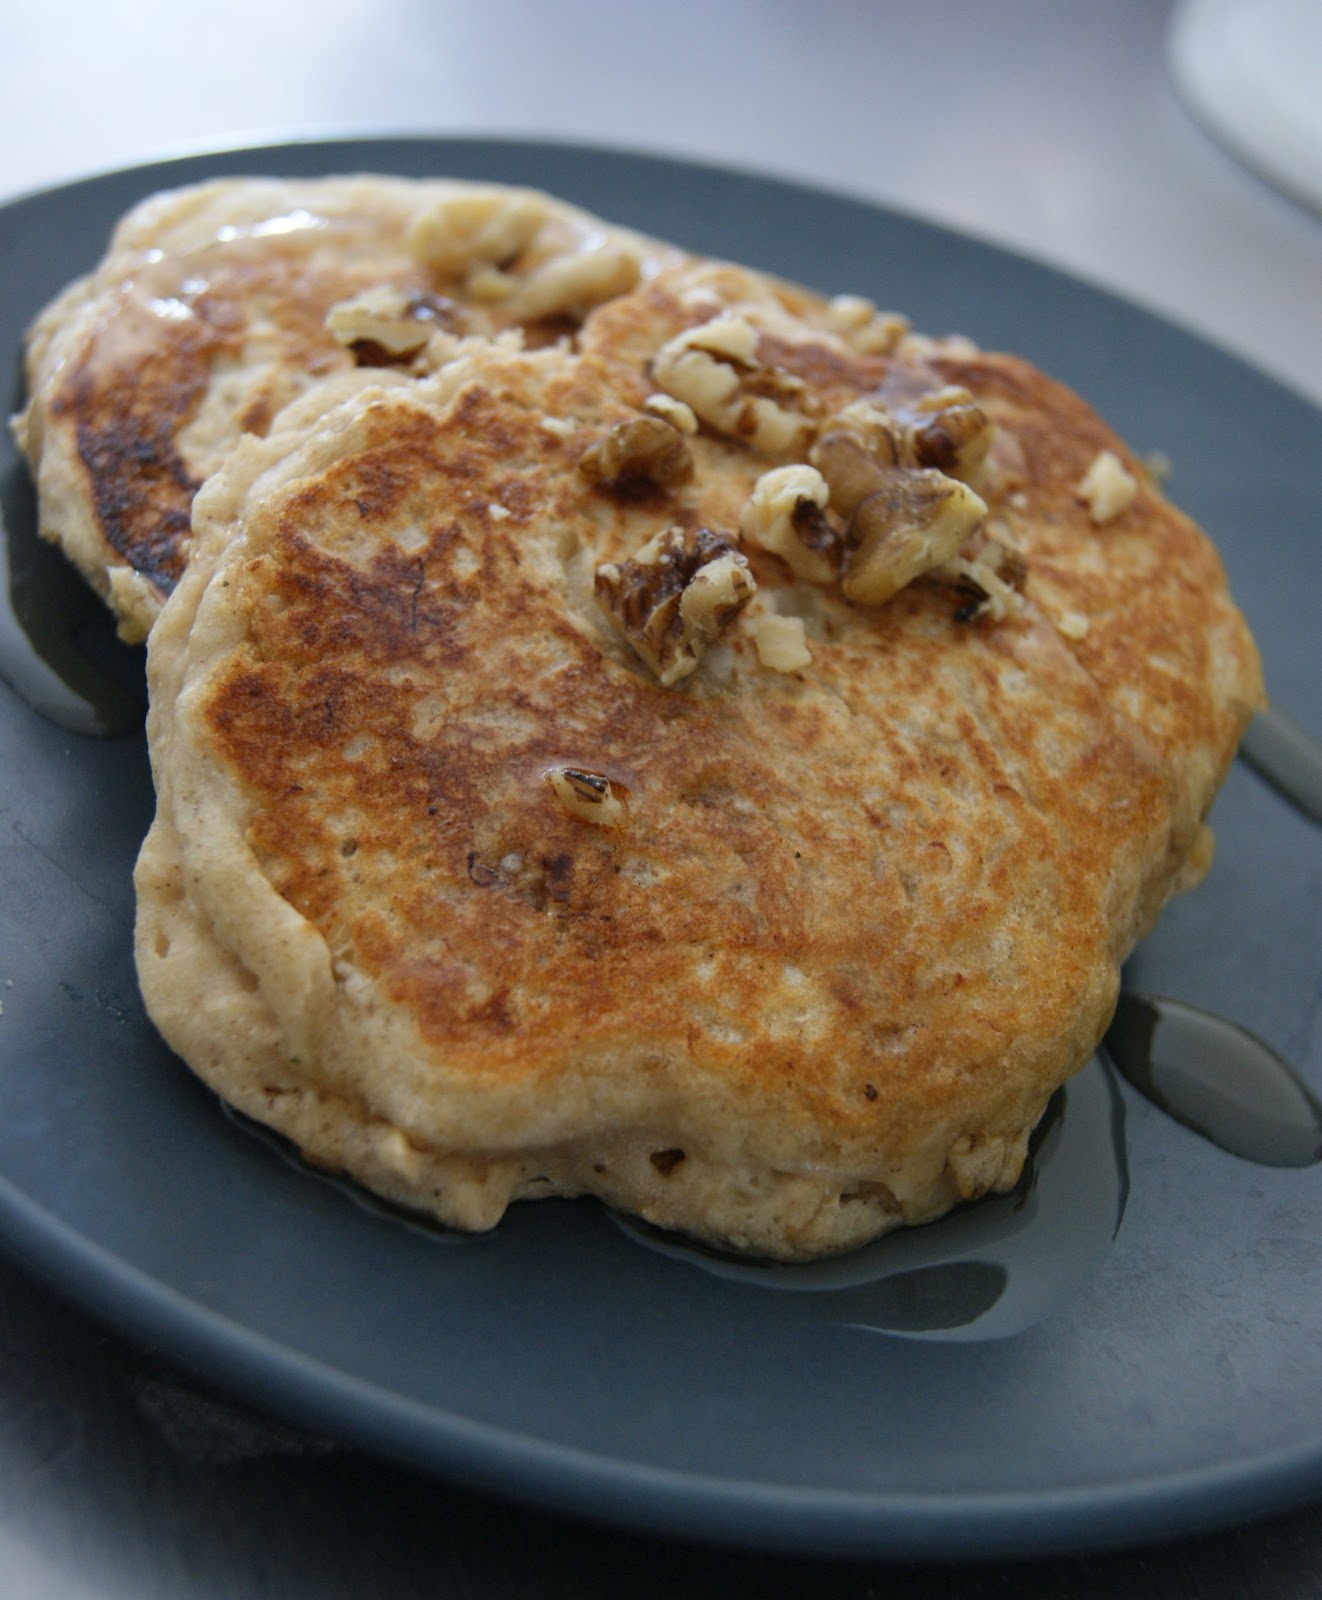
Banana Oatmeal Pancakes

Banana Oatmeal Pancakes with Walnuts and Old Fashioned Maple Syrup


The love affair started with my mother's banana oatmeal cookies - there are no words to describe the addictive qualities of these soft pillows of comforting joy. Anyone that has been around me for a few years know that "banana oatmeal" anything will turn my head and get some mean cravings started. I am known at work for my banana bread muffins and banana oatmeal cookies, constantly receiving requests for them at potlucks and birthday parties. So it was only natural that similar ingredients made their way into a pancake.


The means for putting this into action were sparked by seeing another recipe for banana oat pancakes that looked....okay... After reading feedback and reviews, better ideas started forming and in no time these hot cakes were on the griddle. So easy so scrumptious and sooooo much like banana oatmeal cookies flattened out and drizzled with maple syrup!

This recipe calls for very little sugar, so using a super ripe banana is critical for these coming out with a balanced level of sweetness. The high-fiber, protein-rich oats give the batter a cookie-ish texture that fluffs up really nicely in the pan despite not spreading like typical pancake batter. As long as you are not too finicky about the shape, and as long as your love banana bread like any sane person, you will fall in love with these.


Banana Oatmeal Pancakes
Makes: 8 pancakes
Total time: 25 minutes

Ingredients

1/2 c. all purpose flour
1/2 c. whole wheat pastry flour
1 T. brown sugar
2 1/2 tsp. baking powder
1/4 scant tsp. salt
1 medium (very ripe) banana
1+ c. almond, soy or rice milk
1 tsp. vanilla
1/4 tsp. almond extract (optional)
1/2 c. rolled oats

1/2 c. walnuts, chopped
Maple syrup (REAL maple syrup of course)

Directions

Mix flours, sugar, baking powder and salt together in a medium bowl. Set aside.

Mash banana until liquified and add remaining wet ingredients. Whisk until well blended. Add wet ingredients to dry mixture, adding more almond milk as necessary (depending on size and moisture of banana). Be careful not to over mix! Stir in rolled oats (batter will be pretty thick - it's ok). Let batter rest while skillet starts to heat.

Heat a large skillet over medium heat and coat with cooking spray - be patient, you don't want to the pan to overheat. When hot, scoop 1/4 cup of batter into pan and smear into sort-of-round shape (batter will be thick, so do your best and don't be too picky about the shape).  The pan should fit about 2 cakes. Cook pancakes on each side until just golden brown, about 1-2 minutes per side. Lower heat to just under medium to ensure pancakes crisp on the outside and cook all the way through.

Serve with a scoop of walnuts and small swig of maple syrup. Mmmmmmmm.

Wednesday, March 7, 2012

Fake Out Tuna Salad Sammie


Mock tuna salad? Yeah right, you can't mock tuna.

Having been immersed in the vegan cooking world for over 3 years, I've come across a recipe or two for vegan "tuna" salad. I had my doubts. The texture, the fishy taste, and the deli feel were not promising qualities from substitutes like chickpeas. A whole lotta love do I have for my gusty garbanzo friend, but I just wasn't enticed enough to try my own version.

Never underestimate these beans. I totally fell for it when I mashed this concoction up, thought it was tuna. Ok not really, but it was damn good. What inspired me to finally try this? My obsession with Veganaise. And Dijon. These two staples have been increasingly more prevalent in my everyday dishes and the thought of whipping in a dollop of Veganaise  into mashed anything makes me salivate. That thought would be SO gross if I were talking about real mayo, right? I do use the reduced fat version to cute extra calories and make myself feel better about smothering everything in fake mayo. It tastes just as good.

Pretty sure omnivores and veg heads alike will adore this recipe. I even think I can pass this off at the next company potluck without anyone branding it as a "vegan" dish. If you don't have seaweed flakes, no biggie. You could always crumble sheets of nori if you have it. The only reason I have them is because I fell for a sale at Whole Foods (it was a two-fer). Use quality Dijon though such as Maille and actual Veganaise rather than imposter soy mayo substitute (Noya - gag). You could also try yogurt for a low fat mayo replacement as well. Between some pita and greens, you're gonna wish they sold this at your deli.

Fake Out Tuna Salad Sammie
Makes 2 servings
Prep time: 5 ish minutes

Ingredients

1 c. cooked chickpeas or canned (drained and rinsed)
1 large celery stalk, diced
1 stalk green onions, white parts included, diced
1 heaping T. reduced fat Veganaise
1/2 T. quality Dijon mustard
1/2 tsp. dried kelp
1/2 tsp. salt
Dash of freshly ground black pepper

1-2 pita rounds
1 c. mixed greens

Directions

In a medium bowl, mash peas with a potato masher or pulse in food processor a few times until broken up but still chunky. Be sure to leave some hunks. Mix in remaining ingredients, adding more seasonings or condiments to your liking.

Slice pitas in half and stuff each half with greens and a generous scoop chuna salad.

Thursday, March 1, 2012

Chick au Poivre with Frites


Every now and then, or maybe a little more frequently than that, my token omnivore and I enjoy a good veg session on the couch with a good movie and snuggle time with the pup. This usually involves a meal eaten in our laps at each other’s sides which makes the experience wholesome and special. Most meals have a way of doing that, don’t you think?

So this week, after the hype of the Academy Awards, I was itching to see Hugo. For one, it takes place in Paris and I love all things French (except the B.O.). Plus, with Martin Scorsese in charge now donned with a fresh Oscar, it sounded like my kind of flick. This of course led me to believe we must have something French for dinner. The options however didn’t sound that appealing as I ran through the list of basic ideas: ratatouille, crepes, cassoulet, some kind of tart. Boring. Until I came across a recipe for Steak au Poivre.

To be honest, I was enticed by the French Fries in this picture during my research. So I started thinking about a steak replacement. Leftovers from last weekend’s ski trip? That’ll work! Both the cooked pasta and canned chickpeas needed to be used up before sliming over in the fridge, and I recalled reading a veggie burger recipe somewhere with a secret ingredient of pasta as a binding agent. Can’t remember the source, but the idea sure stuck.

A picture for inspiration and some fridge-clearing creativity brought me to this fabulous meal. Complete with, yes, frozen French Fries. We don’t have to be classy all the time.

Chick au Poivre
Makes: 4 patties
Cook time: 20-30 minutes

Ingredients

1 c. whole wheat or GF pasta, cooked
½ T. soy sauce, tamari or Braggs
½ T. vegan Worcestershire sauce
½ T. poultry seasoning
4-5 drops liquid smoke
¼ tsp. chick-un bouillon (optional)
1 c. chickpeas (drained and rinsed if using canned)

¼ c. tapioca starch
¼ c. rice flour
½ - 1 tsp. freshly ground black pepper
1-2 T. quality Dijon mustard
1-2 T. vegetable oil
Red Wine Glaze (recipe below)

Directions

Place the pasta in a food processor and process for 20-30 seconds, or until pasta is well ground. Transfer to a bowl and stir in soy sauce, Worcestershire, poultry seasoning and liquid smoke. Blend to incorporate seasonings. Add chickpeas to the mix and mash with a potato masher or fork to break up the chickpeas leaving some chunks.

Place tapioca and rice flours into a medium bowl and stir in your desired amount of ground pepper. Set flour aside for dipping.

Form the chickpea mixture into 4 circular or funky-shaped patties. Brush one or both sides with Dijon mustard and coat both sides well in the rice flour mix. Transfer to plate and/or refrigerate to firm up patties if desired.

Heat oil of choice in a nonstick skillet over medium-high heat. When pan is hot, add patties and cook until browned on each side, about 3 minutes per side.

Serve patties with a spoonful or two of Red Wine glaze and a good dose of French Fries!

Red Wine Glaze

Makes: about ½ cup
Cook time: 5-7 minutes

Ingredients

½ T. Earth Balance
2 T. shallots, minced
½ c. dry red wine
½ c. vegetable stock or broth
1/3 c. non-dairy milk or creamer of choice

Directions

In a small saucepan, melt Earth Balance over medium heat and add shallot. Cook 1-2 minutes or until softened. Add red wine and broth and increase heat to medium-high. Reduce by about half and add milk/creamer of choice. Reduce heat to medium again and cook the liquid down until sauce is nice and thick, using your judgment of when to pull the plug on the heat.

Monday, February 13, 2012

French Lentils with Apple Braised Brussel Sprouts

Red, yellow, green, brown: a rainbow of lentils. What's the difference? Without going into the delicate nuances of each legume, let's take a look at one that isn't in this color scheme. French lentils. Sometimes French lentils and brown or green lentils are synonymous names for the same bean, but the kind I'm talking about are the Lentilles du Puy. That's right, the fancy kind. And if you ask David Lebovitz, a reliable source of French cooking expertise, these puppies are the "caviar" of lentils.

Their flavor is more robust than other lentils, a trait Monsieur Lebovitz contributes to their volcanic environment (um sure ok, I'll take his word for it). Whatever the source of deliciousness, I am now including these as a pantry staple. Other lentils get mushy very easily, but these hold up well in texture and taste. Rarely can I eat lentils alone unless I'm in the mood for a nice cup of dahl, yet I scarfed down a whole bucket of these in this recipe. Maybe scarf isn't the appropriate verb, because it felt as though eating such a delicate pulse called for delicate means. So with a dainty fork in hand and pinky raised, I savored each bite.

Though I already talked about my current apple juice phase, here is another recipe using the same technique with the same fabulous results. Very simply braised brussel sprouts finished with a touch of jus de pomme and a petite smudge of moutarde. So light, so lovely. Serve under the lentils with a side of roasted fingerlings...Tres tres bon.

French Lentils with Apple Braised Brussel Sprouts
Makes: 2 servings
Cook time: 40 minutes

Ingredients

For the Lentils
1/2 c. French lentils
1/3 c. yellow onion, diced
1/2 medium carrot, diced
1 stalk celery, diced
2 bay leaves
1/2 tsp. thyme
1/2 tsp. sea salt
2 c. veggie stock or broth
1/4 c. red wine

For the Brussel Sprouts
3/4 c. veggie stock or broth, divided
2 c. brussel sprouts, stems removed and thinly sliced
1/4 c. apple juice
1 tsp. Dijon mustard

Directions

In a medium sauce pan, combine all of the ingredient for the lentils except for the wine. Bring to a boil and then reduce heat to medium or medium low (depending on the stove). Simmer lentils at a slow boil until most of the liquid has evaoprated, about 25-30 minutes, covering the pot for about 5 minutes toward the end. When there is just a bit of broth left, add the wine and cook an additional 5 minutes. Season with salt and pepper to taste.

When the lentils are nearly done, heat a large skillet over medium high heat and bring about half of the broth to a boil. Add brussel sprouts and lower heat to medium. Braise about 5 minutes or until liquid has almost evaporated. Add another 1/4 cup of broth, apple juice and mustard. Cook until sprouts are tender and liquid is absorbed. Season with salt and pepper to taste.

Saturday, January 28, 2012

A Dijon Doodad Veggie Mix


I love all things mustard. All things. Having spent 6 months in France and 2 months in Germany a while back, I developed a whole new appreciation for quality mustard. We're starting to make some good competitors in the US with spicy stone ground, stout infused, red wine swirled varieties. But are we cooking enough with it? I think not. It goes into almost all of my salad dressing and lately it's been going into the stove top dishes as well.

Another new ingredient in my cooking routine that has surfaced since Christmas is apple juice. We get mini single serving bottles each year in our stockings and since I'm not a big juice drinker, it usually sits in the fridge until I remind my other half to drink it. I know it's a weird choice, but for some reason a splash of apple juice can completely change a dish! (I've heard this to be true of apple cider vinegar, but I can't subscribe to that recommendation after trying it.) If a dish is a little too sour/acidic, overly salty or missing depth, it could be just the thing to give it a quick makeover. I now highly recommend having a single singer bottle in the fridge to use a tablespoon or 2 at a time.

Which is what I needed today making lunch. This was of course a classic instance of trying to use up the almost-gone ingredients in my fridge. Many of the ingredients are interchangeable with something you might have in your fridge. Use summer squash instead of winter squash, chard instead of kale, celery instead of fennel, or whatever you have lying around. The method is what will give you lovely results. Braise everything to start in broth but finish during the last couple of minutes with apple juice and a dollop of good Dijon mustard. Neither French nor German, this little ditty is still zer gut.

Braised Vegetable Medley with Apple Dijon Sauce
Makes: 1 servings
Cook time: 15-20 minutes

Ingredients

1/4 c. apple juice
2-3 tsp. Dijon mustard
1/2 tsp. maple syrup (optional)
1/2 c. fennel, chopped
3/4 c. veggie broth, divided
1/2 c. artichoke hearts, from jar or frozen (drained or thawed)
1/2 c. green beans, chopped
2-3 sun dried tomatoes, chopped (drained if packed in oil)
1/4 tsp. dried oregano
1/4 tsp. dried rosemary
1/4 tsp. dried thyme
1/4 tsp. sea salt
1 c. cooked or parboiled butternut squash, cubed
1 c. kale, chopped
Freshly ground pepper to taste
Parsley for garnish

Directions

In a small bowl, whisk the juice, mustard and maple syrup (if using) together. Set aside while you prepare the veggies.

Heat a medium skillet over medium high heat and coat with cooking spray. Add fennel and saute 2-3 minutes or until it softens. Add 1/2 cup of broth and the next 7 ingredients (thru the salt). Lower heat to medium and cook until broth evaporates, about 5 minutes. Add butternut squash, kale and remaining broth. When the broth has evaporated again (another 3-4 minutes), add the apple juice mixture. When the liquid start to boil, lower heat and simmer until liquid has reduced and thickened, about 3 minutes. Top with freshly ground black pepper and chopped parsley.

Sunday, December 25, 2011

Teeny Weeny Zucchini Bites


Ok they're not that teeny. And they are definitely note weeny. But they are surely zucchini.

Christmas Eve is usually a big hullabaloo consisting of lots of family, wine, loud chatter, dinner, carols, more wine and too many cookies. That’s Minnesota style holidays on my side of the family. But this year, we were on the Arizona rotation where there isn’t really a Christmas Eve tradition. So we decided to spend it, just me and my other half.
I had a crazy desire to make gnocchi because I thought it would be fun to make together. But it takes foooor-evvvvvv-er. Well it takes a while for the potatoes to bake anyway. Knowing we had a long wait ahead of us before any dinner would manifest, I turned to my favorite taste-tester and said “What would you like to nosh on whilst we await this glorious.
Fabulous idea it was. I had only made these once before and did not use breadcrumbs because of a gluten allergy in the audience of eaters. Well not this time, so I loaded up on the panko and added a pinch of vegan cheese. Oh boy, these suckers are making into the regular rotation for potlucks and entertaining. Simple ingredients, easy to make, and beautifully scrumptious. Not to mention they made a wonderful stand-in for the Christmas tree we did not set up.
Teeny Weeny Zucchiini Bites
Prep time: 15 minutes
Cook time: 20 minutes
Ingredients
3 T. plain soy yogurt
3 T. veganaise
¼ tsp. onion powder
2/3 c. panko
2 T. nutritional yeast
½ tsp. garlic salt
1/3 c. Daiya cheese or other vegan cheese
Optional: bac’un bits, crushed red pepper
1-2 small/medium zucchini, sliced into ¼ inch thick rounds
Directions
Preheat oven to 400*F. Cover baking sheet with aluminum foil and coat with cooking spray.
In a small bowl, whisk together the yogurt, veganaise and onion powder. Set aside. In another bowl, combine the panko, nutritional yeast and garlic salt and stir until well combine. Have the cheese nearby in another bowl for prep.
Dip each zucchini round in the yogurt mixture followed by the panko mix. Cover completely with crunchy coating and place on the baking sheet. Place a little pinch of Daiya or cheese. Top with a few bac’un bits or a few flakes of crushed red pepper if desired.
Bake for about 20 minutes or until crispy brown.

Monday, December 12, 2011

Spaghetti Squash Gratin


Chilled to the bone. You midwesterners might call me sissy, but it's been c-c-c-cold down here. Which isn't a bad thing, because I love my warm clothes. And the only real cure for chilly weather and a downstairs without heating vents is something warm, soft and scoopable. Yep. Scoopable. The scooping is pivotal to the warming process.

Lately, I've come to adore spaghetti squash. I wrote a post long ago regarding my dismay at the hulabaloo around spaghetti squash, failing to find anything special about the stringy stuff. But for some reason, the fall of 2011 was the beginning of a magical season for me and the big yellow guy. An interest in getting away from too many grains and cooking with more of a variety of starches has been good for our relationship. We've grown. We're tight. With few calories and more nutrition, it's now my preference to actual spaghetti. I usually eat it al dente with all the same toppings you'd put on noodles.

That is, until I ordered a side of spaghetti squash at the local eatery across the street. While I typically like all veggies a little crisp (wth the exception of potatoes, duh), I realized how much I seriously undercook spaghetti squash. This lovely, soft, pillowy version of a squash I thought I had come to know gave me the ah-hah moment. This is why people love it so much. Buttery, smooth comfort. So with 1.25 spaghetti squash lying around, 1.5 cans of diced tomatoes, and about .25 bags of chickpea flour in the kitch, I curse the 56 degrees outside and set out to make myself a scoopalicious comfort good. Gratin.

I found one recipe that matched my mood for warm and scoopy with a nice tomato sauce, but of course it calls for a lot of cheese. Naturally my random mind came to a brilliant alternative - how about a socca on top? Since I'm so good at posting hyperlinks today, I also wrote a recipe for socca a while back. It's like a pancake made out of chickpeas. Yum. So instead of ricotta on top, I added a good amount of plant protein with a chickpea flour batter. It baked nicely in the oven and added an extra creaminess that made this perfect. Enjoy on a cold evening complete with red wine and more red wine.

Spaghetti Squash Gratin
Makes: 3-4 servings
Total cook time: 2 hours

Ingredients

1 medium spaghetti squash

2 tsp. olive or coconut oil
3 garlic cloves, minced
1 heaping tsp. basil
1 heaping tsp. oregano
1/4 - 1/2 tsp. crushed red pepper
2 14oz cans of diced tomatoes, in juice
Salt and pepper to taste

3/4 c. chickpea flour
3/4 c. almond milk
1 T. nutritional yeast
1 T. cornstarch
Salt and pepper to taste
Pinch of nutmeg and white pepper

3/4 c. shredded vegan cheese, such as Daiya or Kase (optional)

Directions

Preheat oven to 450*F. Fill a large roasting pan with 1/2" of water.

Cut squash in 2 or 4 pieces and scoop out the seeds. Place squash flesh side down in roasting pan and cover with aluminum foil. Roast in oven for 40 minutes or until very tender.

While the squash is cooking, prepare the tomato sauce. Heat oil over medium-low heat and cook garlic slowly until fragrant, about 1-2 minutes (being careful not to burn). Add herbs and crushed red pepper. Stir for another 30 seconds and add tomatoes, salt and pepper. Increase heat to medium high and bring sauce to a low boil. Reduce heat to medium and cover. Simmer sauce for 20 minutes or until the "canned-ness" is cooked out of the tomatoes (alternatively, you could make your own fresh tomato sauce instead of being a bum like me).

While the sauce simmers, prepare the socca batter. Combine all ingredients in a medium bowl and set aside to rest. At this point you should be able to return to the baking squash. Remove from the oven when tender and reduce temperature to 375*F.

Using a spoon, lift the squash flesh away from the skin (sounds gross like a freshman year biology class). Season with salt and pepper to taste and tranfer to a casserole dish. Layer the bottom completely with squash and cover with tomato sauce. Sprinkle half of the cheese over the sauce (if using) and cover evenly with batter. Sprinkel remaining cheese on top and bake for 45-55 minutes, or until socca has set and browned on top.

Let cool 10 minutes before serving (we both burned our tongues getting a little antsy).

Tuesday, October 4, 2011

Mexican Risotto and Beans


Day 2 of Vegan MOFO: As I expected, coming up with a "recipe" is a little high maintenance every day.  But then again, what I think of as a recipe is really kitchen voodoo to someone else. And what someone else thinks is a recipe, I think is more an assembly. Tomay-to, tomah-to.

Call this a recipe or a matter of assembly, but it's one of my favorite convenience meals especially after a long and late workout when I have little energy to cook. This simply requires having the ingredients on hand rather than carefully crafting them in a cooking-like fashion. In short, the stove does the work for you. You just have to show up with the goods. What I'm calling "risotto" is truly just Mexican rice that comes out looking like Italian risotto because of the broth and nutritional yeast making a saucy, creamy goodness. In fact, this isn't just rice. I mixed quinoa and rice together because that's what I had left over in the fridge and there wasn't enough rice to make a whole serving. The spinach was the last of a bag that didn't have enough to make a salad. Creativity points?

So what perhaps is one of the laziest, unchef-ish meals to come out of this kitchen, is in fact a go-to staple at our residence and one that all kitchens should have on hand just in case. Bring out the can opener, scrounge through your leftover grains and eat like it's sophomore year in college.

Mexican Risotto and Refried Beans
Makes 2-3 servings
Cook time: 5 minutes

Ingredients

3/4 c. cooked rice
3/4 c. cooked quinoa
1/2 tsp ground cumin
1/2 tsp chili powder
1/4 tsp paprika
1/4 tsp oregano
1/4 tsp onion powder
1/4 tsp garlic powder
1/8 tsp cayenne or crushed red pepper
  -- or use 2 tsp of your favorite taco seasoning
Pinch of salt
1/2-3/4 c. vegetable broth, divided
1 1/2 T. nutritional yeast
3/4 c. spinach

1 can refried beans
Salsa
Guacamole
Fresh tomatoes, diced
Hot sauce

Directions

Heat a nonstick skillet over medium-high heat and cover the bottom with 1/4 cup of broth. When broth is bubbling, add the rice, quinoa and spices (through the salt). Stir to completely coat rice. When liquid has almost evaporated and rice starts to stick to the bottom, pour in another 1/3-1/2 cup of broth, nutritional yeast and spinch. Stir again and cook a minute longer or until some of the liquid has evaporated and the texture becomes creamy.

Meanwhile, heat the beans in a sauce pan over low heat. To serve, plate the beans and risotto together topped with salsa, guac and fresh tomatoes. If you're like me and you like a kick, top it all off with a few shakes of Chalula.

Monday, October 3, 2011

Garlicky Parsnip Equinox Mash


Ok sorry I missed the equinox by a few days... Ah hem, well a week plus some. What is the equinox you ask? It's the transition from summer to fall. A time when all Phoenicians royally curse the summer, because this transition is much more tangible in other climates while we are stuck with an overly exuberant sun that perseveres through October.  The equinox my personal favorite of the seasonal changes. It sports my color wheels and means a whole lot more pumpkin in the kitchen! It also makes me nostalgic for falling leaves and autumn in New York. There is nothing I don't like about fall. Especially in Arizona, as fall does not symbolize the coming of chew-your-arm-off windchill winter. You win some, you lose some.

Ok another apology owed. I also missed the start of Vegan MOFO. What is vegan mofo you ask? It's the vegan month of food! October is world vegetarian month, with October 1st being the World Vegetarian Day and the day I was supposed to start blogging on my 31 day vegan montage (see the official site for more participating blogs). Hopefully despite my lack of time due to my yoga teacher training program starting and having a busy life in general, I will be able to contribute daily. Hopefully you despite your lack of time or want to analyze vegan ranting, will be able to enjoy the spirit and taste of this ultimate plant based booyakasha.

So this dish came about spur of the moment of course. Parsnips are one of my absolute favorite vegetables and taste like quintessential fall to me. But somehow every time I purchase them, they end up mingled in with the carrots and I never notice them until they are starting to prune. When they are in the beginning stages of sagging, I always revert to a mash. In a mash, it never matters what the veggie looked like before. And you get all the credit for the taste without the mess of presentation. This is a lighter mash because it's actually a blend of winter and summer squash - how perfectly equinox! Enjoy how simply season it is.

Garlicky Parsnip Mash
Makes 3-4 servings
Cook time: 15 minutes

Ingredients

2 c. parsnips, peeled and sliced
1 c. butternut squash, peeled and cubed
1 medium summer squash, sliced
2 garlic cloves
Pinch of salt

Directions

Place all ingredients in a large sauce pan and cover with water by about an 1-2 inches. Bring to a boil and then lower the heat to medium. Simmer until veggies are tender, about 10-15 minutes. Season with additional salt and pepper to taste. Add any fresh herbs you like to spruce it up!

Tuesday, July 26, 2011

Portobello Barbacoa and Smokey Queso Spread


Turning something inherently carnivorous into a vegan masterpiece is one of my favorite things about cooking. Though I’ve had some success with roasts and loaves, mimicking popular meat dishes has its obvious challenges. Texture, flavor from fat and drippings, cook time, etc. At this point I’ve learned that it’s not about creating an exact replica, but creating an incredible, flavorful, delicious dish in and of its own. The real challenge? Appealing to the skeptics. They don’t always buy the fact that it doesn’t have to taste the same as the fleshy version to taste meatlessly delicious. So you have to set some realistic expectations.

The expectation I set when serving these Barbacoa bites: “Yo peeps! These are friggin’ awesome! No it’s not going to taste like the shredded beef that is typically used in Barbacoa. It’s not supposed to. No the Queso is not going to feel like gelatinous ball park cheez because it’s way better!” These are the real pictures that must be painted for non-believers. And I did. And it worked. I made this recipe as individual “bites” for work, and also made them as roll-ups for a pool party. Both versions were inhaled.

Who could blame these hungry hippos? This Barbacoa recipe is madness. Barbacoa is a style of slow cooking meat in Mexico and relates to the origination of “barbecue.” It’s really all about the sauce. And consistent with any barbecue master, I couldn’t help myself picking at the stringy Portobellos as they slow cooked for hours in a spicy marinade. You may have probably picked up on my obsession with vegan cheesy things as well, so needless to say the food processor and spatula did not have one speck of Queso dip after I was through with it. Finger lickin’ good!

Recommended toppings/accompaniments:
  • slivered spinach or romaine
  • salsa and/or fresh tomatoes
  • vegan sour cream or Veganaise
  • roasted green chili peppers
  • fresh cilantro
 Recommended serving styles:
  • tacos
  • layered Dip
  • burritos
  • tortilla roll ups
Suggestion for Portobello preparation: slice the bellos into thin strings to cook in this recipe. Afterward you can pulse in a food processor to use as a spread if doing layered dip or roll ups.


Portobello Barbacoa
Makes: 6-8 Servings
Prep time: 10 minutes
Cook time: 2 hours

Ingredients

For the Marinade
1/3 c. apple cider vinegar
3 T. lime juice
5 cloves garlic
3-4 chipotle peppers in adobo sauce
1 T. ground cumin
2 tsp. Mexican oregano
2 tsp. sugar
1 tsp. salt
1 tsp. black pepper
½ tsp. ground cloves¼ tsp. allspice

For the Shrooms
2 T. canola oil
1 tsp. cumin seeds
4-6 Portobello mushrooms, sliced 1/8 inch thin (optional to remove gills)
Pinch of salt
Marinade
3/4 - 1 c. vegetable broth (from bouillon)
3 bay leaves

Directions

Place all marinade ingredients in a blender and puree until completely smooth, about 2 minutes. Set aside while you prepare the mushrooms.

In a large stock pot, heat canola oil over medium high heat. When oil is hot, add cumin seeds and cook until they start to pop. Add mushrooms and a pinch of salt. Stir to coat in cumin and cook 3-5 minutes. Add marinade, broth and bay leaves. Turn heat to low and simmer for 2-4 hours. If too spice or acidic, add a pinch of sugar.


Smokey Queso Spread
Makes: 1 ½ cups
Prep time: 5 minutes

Ingredients

1 can white cannellini beans
½ c. tomatoes
1/3 c. nutritional yeast
1 tsp. yellow mustard
1 tsp. Miso paste
1 tsp. garlic powder
1 tsp. onion powder
¼ tsp. paprika
¼ tsp. cayenne pepper
1/8-1/4 tsp. liquid smoke
Salt to taste

Directions

Puree all ingredients in a food processor until completely smooth. Adjust seasonings to taste, adding more salt or cayenne for spice. Add more mustard or Miso for a sharper cheesy taste.

Monday, June 27, 2011

Curried Plantains with Ginger Chard & Mango Relish


Plantains. A love affair.

Plantains are the kind of vegetable I daydream about cooking but always neglect at the market unless sold as a bag of chips. All at once they resonate ocean waves of the Caribbean (where I've never actually been), ice clinking in a nice cold mojito, and shoulder-shimmy cha cha drum beats at the local Salsa club. They are exotic and comforting, sweet and tangy, soft and delicious. So many lovely things wrapped up in one peel! 

Finally, the humble plantain caught my eye this weekend at the grocery store in it's perfectly ripe state. As I prepared for a week of veggie delights, I had no plans or recipes for the impromptu purchase but instead waitied for the inspiration. And it came with no work at all. I have a weakness for the aforementioned plantain chips, which are delicious but terribly addicting and therefore not so waist-friendly. Plantains are typically fried and served plain, but I had better intentions. Lower fat and more flavor.

This sweet, succulent and spicy dish came from blending Caribbean and Indian flavors, two different cuisines that are closer in flavor than they appear. Mango is common in both which made me think of a very underused jar in the back of my fridge...pickled mango was an impulse buy from a local Indian grocer. I had no idea how spicy it was at the time (runny nose spicy), but it was perfect in the relish and complimented the sweet flavors of the dish. The crunchy relish went perfectly with the soft texture and the garlicky ginger greens served as a scrumptious undertone to the symphony in my mouth. Well maybe less like a symphony and more like the Mamba. Cue in that cha cha drum beat.

Curried Plantains with Ginger Chard
Makes 2 servings
Prep time: 15 minutes
Cook time: 30 minutes

Ingredients

For the Plantains
2 ripe plantains, peeled and diagonally sliced
2 tsp curry powder
Cooking spray
Black pepper

For the Ginger Chard
1/2 T. fresh ginger root, minced
1/2 tsp. jalapeno, minced
3 garlic cloves, minced
2-3 cups Swiss chard, chopped
Salt to taste

For the Relish
1/4 c. red bell pepper, finely diced
1/4 c. grape tomatoes, quartered
2 medium radishes, finely diced
1 green onion, finely sliced
1 tsp. pickled mango or mango chutney
1 tsp. dijon mustard
1/2 tsp. agave nectar
Cayenne pepper (optional)

Directions

For the plantains: Preheat oven to 450F. Coat a baking sheet with cooking spray. Place the plantain sliced in a medium bowl and also coat with cooking spray. Toss plantains with curry powder and another quick spritz of cooking spray (alternatively you could use a half tablespoon of canola oil, but I like the spray's coverage better). Sprinkle plantain slices with black pepper. Transfer slices to baking sheet, making sure the slices are evenly spaced and laying flat without overlapping. Roast for 20-25 minutes or until slices become dark golden brown and crispy around the edges.

While the plantains are roasting...make the chard!

For the chard: Heat a medium skillet over medium-high heat and generously coat with cooking spray. When pan is hot, add ginger, jalapeno and garlic. Lower heat to medium and cook until ginger becomes fragrant, 30-40 seconds. Add chard and a splash of water (2 tablespoons), stir to coat in ginger mix. Add a pinch of salt and stir frequently until chard is wilted and tender, about 5-7 minutes. Remove from pan and set aside.

When the chard and plantains are done...whip together the relish!

For the relish: Mix all relish ingredients together. If you do not have pickled mango, use mango chutney plus 1/4 tsp cayenne pepper or super spicy hot sauce. If using mango chutney, be careful with the agave, as you may not need it. If using pickled mango, beware! Taste before adding more.

To assemble: Divide the chard between two plates and top with plantains. Scoop a few tablespoons of relish or more over the plantains and serve with a side of Caribbean Cauliflower rice (below).


Caribbean Cauliflower Rice
Makes 2 servings
Prep time: 5-7 minutes

Ingredients


2 cups cauliflower flowerets
1 T. coconut, dried and unsweetened
1 T. dried currants
1/4 tsp. turmeric
1/4 tsp. thyme
Salt and pepper to taste


Directions


In a food processor fitted with an "S" blade, pulse the raw cauliflower until crumbled. Transfer to a medium mixing bowl and mix with currants and spices.


Heat a medium skillet (preferably the one you cooked the chard in and didn't clean yet) over medium high heat and toast the coconut until fragrant, about 30-45 seconds. Add cauliflower mixture and 1-2 tablespoons of water. Season generously with salt and pepper. Stir well to heat through and remove from heat. Serve alongside plantains and chard.

Friday, April 22, 2011

Cannellini Risotto with Peas and Fresh Herbs


I should add a "recession-friendly" category when I tag recipes. There is a common notion that following a vegan lifestyle is more expensive and more work. Ok it's not completely unfounded, but vegan cooking and eating doesn't have to break the bank and doesn't have to take hours and hours. We're all feeling a little thrifty, a little stretched, willing to take more bargains. Fortunately with risotto, you don't have to compromise taste or time to suit your wallet.

After making a couple of big arse payments for various loans in attempt to feel more responsible and less debt ridden, I am definitely looking to cook more budget friendly recipes. And with the madness that has ensued this spring - flying between Minnesota, Houston, Boston, Jersey and back to Phoenix in a matter of 4 weeks - I am also looking to cook easy recipes that don't require much thought. Though risotto requires time at the stove, if you have a companion and a glass or wine (or your companion IS the glass of wine), the time will fly by. In a matter of minutes, your rice will be soaked in flavorful goodness and your freshly snipped herbs put to good use.

I highly recommend using a great hodgepodge of herbs in this recipe. I had lots of parsley, basil and chives, but a sprinkling of mint and thyme went nicely into the mix. You could stir in blanched asparagus or frozen spinach instead of peas if little green orbs aren't your thing. I didn't exactly break this down cost-wise, but I promise this is one of the cheaper, tastier meal you'll enjoy in your own home.


Cannellini Risotto with Peas and Fresh Herbs
Makes: 2-3 servings
Cook time: 30 minutes

Ingredients

3-4 c. vegetable broth, water, or mix

1 T. olive oil
2 T. shallots, chopped
1-2 T. garlic, minced
2 tsp freshly grated lemon peel
3/4 c. white rice, pearled barley or arborio rice
1/2 c. dry white wine
1 c. fresh or frozen green peas, thawed if using frozen
1 c. cannellini beans, from canned (rinsed) or cooked from dry
3 T. nutritional yeast
3 T. almond or soy milk
1/3 c. fresh mixed herbs: basil, parsley, chives, thyme, etc.
Salt and pepper to taste

Directions

Heat the broth/water mix over medium heat in a medium sauce pan. When broth comes to a low boil, reduce heat to medium low. Keep broth on burner while you prepare the risotto.

In a large skillet, heat olive oil over medium high heat. Add shallots and garlic and cook until garlic becomes fragrant, about 1 minute. Add the lemon peel and rice and a pinch of salt. Stir to coat completely in flavored oil and cook another minute or so. Add the wine and let cook until almost all the moisture has evaporated. Reduce heat to medium low and pour in 3/4 cup of broth. Let rice mixture cook until has absorbed almost all liquid. When the pan starts to dry again, add another 3/4 c of broth. Repeat this 2 or 3 more times until rice is fully cooked.

When rice is tender and most of the liquid has been absorbed, add peas and beans and cook until peas are just heated through. Stir in nutritional yeast, milk, and fresh herbs. Season with salt and pepper to taste.

Monday, February 14, 2011

Spaghetti Squash Primavera

Squash, squash, squash. I love squash. All kinds, all colors, all textures. But I must admit I’ve always wondered what is so special about spaghetti squash that makes people love it so much. The stringy flesh is fun – I get that. But the texture never fully softens like some of the more tender squashes, and the taste isn’t sweet or light like other types. It’s almost bitter with a borderline tasteless flavor. Perhaps I am just not skilled at selecting spaghetti squash. I’ve just never fallen for it as a varietal.

Nevertheless, I purchased one as part of a detox plan and was entirely committed to eating it. I mustered and searched for some crazy, fun idea for how to prepare the stringy structure, but my contemplative quest was fruitless. I stumbled across a vast array of side dish recipes that mainly mix spaghetti squash with herbs or garlic. Nothing stood out as a potential show stopper. It wasn’t until I started delving into pasta ideas that I saw the word “primavera.” Eureka!

Primavera is so easy that it feels weird to even write down a recipe for it. For anyone that has had any exposure to cooking, pasta primavera is about as basic as it gets. It certainly doesn’t seem like it should get special props, but I was amazed by the satisfaction from these simple, fresh flavors and so very please with how they took to spaghetti squash. First you take fresh veggies and garlic, then you splash 'em with a little white wine, and top it off with fresh herbs. You can mix up the veggies and the herbs to your liking - this is a highly customizable dish. Just don't cook the veggies too long, al dente is best here. And always throw the herbs in at the end when you've taken the dish off heat, it keeps their flavors bright and vibrant.

This recipe mad a heaping portion for 2 and as I licked the bottom of my plate, I felt more than satisfied. I felt accomplished! That’s the wonderful thing about primavera. It’s so little work with such fabulous results. You can certainly substitute the squash here for actual pasta, but I would highly recommend going for the squashventure.

Spaghetti Squash Primavera
Makes: 2 servings
Prep time: 15-20 minutes

Ingredients

1 small spaghetti squash (about 4x7 inches)
1 tsp coconut oil
1 large garlic clove, minced
½ tsp. crushed red pepper
¼ tsp. salt
½ medium red bell pepper, sliced
12-16 asparagus spears, chopped (tips reserved)
1 ½ c. broccoli, chopped
¼ c. dry white wine
2 T. fresh parsley, chopped
2 T. fresh cilantro, chopped
2 T. nutritional yeast
Salt and fresh ground pepper to taste

Directions

Fill a medium baking dish with 2 inches of water. Cut squash in half lengthwise and scoop out seeds. Place both halves in baking dish skin side up, flesh side down. Microwave on high 5-6 minutes or until squash is tender. Let sit until cool enough to handle and scoop out flesh. Set aside.

Heat coconut oil in a skillet over medium-low heat. Add garlic and cook slowly until it starts to brown, stirring constantly to coat in oil for about 1 minute. Add crush red pepper and salt, stirring to blend evenly. Increase heat to medium high and add vegetables. Stir to coat with spices before adding wine. When pan is very hot, pour wine over vegetables and continue to toss in pan. Let cook/steam about 5 minutes or until vegetable become al dente. Add squash, parsley, cilantro and nutritional yeast. Stir to incorporate all ingredients and remove from heat. Season with salt and lots of pepper to taste. Garnish with fresh tomatoes if desired.

Tuesday, February 1, 2011

Butternut Squash Enchiladas

Bring out the mariachis! I’m doin’ a little cha cha in my cucina. We were feeling spicy last night and decided on enchiladas for dinner – something easy, something different, something fun. One of my favorite fillings for enchiladas is butternut squash, because the sweet meshes so well with the spice and the texture blends perfectly with tortillas soaked in sauce. This was actually our main holiday meal this year which was SO much better than the usual surf and turf or roast with potatoes. As my token omnivore had no recollection of this being our Christmas meal despite that being one month ago, I was totally game for remaking the dish and reminding us of the terrific flavors.

Enchiladas are a wonderful, flexible meal because they can be easily customized to your personal preferences or easily made to please a whole crowd. Sometimes I roll them in individual tortillas; in this recipe I layered them as a casserole. It’s really all about the sauce. If you have a good, spicy sauce, then the form in which the enchiladas take is trivial. What I like about casserole style is how the sauce covers everything.

So what makes the sauce so special? I really don’t know. I’ve made a few different kinds of sauce: tomato based, pepper based, and a blend of the two together. I’ve loved them all. The first recipe I tried was incredibly spicy which I loved, but it's not for the faint hearted. The second sauce was concocted by mia bella sorella over Christmas who used tomato sauce and a blend of spices. The recipe here was derived from Veganomicon and uses diced tomatoes with roasted green peppers. I happened to add a little chipotle in adobo sauce which took it up a notch.

I only covered half of the casserole with Daiya cheese, because I actually like it without cheese. But I loves me some cilantro and I highly recommend topping off your slice with a couple of sprigs and a pinch of cayenne. Whether you’re making this for Navidad or when you’ve got a case of the Mondays, it’ll be sure to scratch you where ya itch.

Butternut Squash Enchiladas
Makes: 3-4 servings
Cook time: 1 hour

Ingredients

For the sauce
1-2 poblano, pasilla or anaheim pepper
2 tsp olive or canola oil
½ medium onion, diced
1 T. fresh garlic, minced
1 T. chipotle peppers in adobo sauce
1 tsp chili powder
½ tsp. cumin
½ tsp marjoram
½ tsp oregano (Mexican)
1 14 oz. can diced tomatoes, roasted or fresh
1 tsp. raw vegan sugar
½ - ¾ c. almond or soy milk
Salt to taste

For the filling
1 small butternut squash, peeled and cubed, about 2 cups
3 c. spinach, rinsed

For the enchiladas
9-10 corn tortillas
½ - ¾ c. Daiya cheddar cheese
Cayenne pepper to taste
Fresh cilantro, chopped

Directions

For the sauce: Preheat oven to 450° or high broil setting. Roast whole peppers 15-20 minutes until skin is blackened and blistered, rotating once or twice to ensure all sides are cooked. Remove and set aside in a paper bag to cool before handling.

Heat a medium sauce pan over medium-high heat. Sauté onions in oil until they begin to brown, about 6-8 minutes. Add garlic, chipotle peppers, spices/herbs, and a pinch of salt. Stir and let cook another minute before adding tomatoes. Bring sauce to a low boil and reduce heat medium low. Let simmer 15-20 minutes to let flavors blend. Add a small pinch of sugar to balance the acidity and bring out the spice.

Meanwhile, return to peppers. Peel the skins off, remove seeds and discard. Chop peppers coarsely and set aside. When sauce is done, transfer to food processor or blender and puree until smooth, adding almond milk until desired thickness is reached. Transfer sauce back to pan and stir in roasted peppers. Season with additional salt if necessary.

For the filling: While the sauce is simmering, bring another pot of water to boil. Add squash and lower heat to medium. Cook until squash is tender and falls apart easily. Place spinach in a medium mixing bowl in the sink. When you strain the squash, strain the hot water over the spinach to blanch. Set squash aside in a mixing bowl and strain spinach once it is slightly wilted. Mash squash until smooth but slightly chunky and fold in spinach.

To assemble enchiladas: Preheat oven to 350°F. In an 8x8” square pan, coat with cooking spray and spoon sauce to thinly cover the bottom, using about 1/3 cup. Place 3-4 tortillas over sauce and spread half of squash filling over tortillas. Spoon another ½ cup of sauce over squash and lay another 3-4 tortillas. Repeat with the next layer, spooning remainder of squash and another ½ of sauce. Finally, place another layer of tortillas over the top and cover with remaining sauce.

Bake for 20 minutes or until sauce sets. Set oven back to broil (optional), and sprinkle the top with Daiya cheese. Bake an additional 5 minutes or until cheese has melted. Remove and let cool 5-10 minutes before serving. Garnish with cayenne pepper and cilantro.

Saturday, January 15, 2011

Blueberry Fennel Salad with Ginger Lime Dressing


We all know a little bit about my dabbling into the realm of cleanses. I have never gone to extremes, eating nothing but psyllium husk or scoops of fiber in a morning shake, nor have I followed one particular cleanse so closely that I reached that point of "clarity" after that "lightheaded" uncomfortable feeling that arises out of starving. I have tried to incorporate herbal tea and lemon water into my morning routine, alternated between hot and cold bursts in the shower, and taken on the habit of regular brief massages to get my blood moving (still can't get on board with the body brushing though - I have a hard time brushing my hair much less the bottom of my feet). In the end, I have never ended a cleanse feeling completely remade. Except for the stomach bug I got a few weeks ago - THAT was a cleanse.

While the thought of so many "failed" cleanses seems disappointing at first, I think it's mostly because I don't eat a ton of crap as part of my normal diet. Yes even vegan diets can be full of crap. Still, the cleanse for me has always been more about the idea than the execution. When I've been eating too many processed foods, overeating because of stress/boredom, or eating out too much, I start to feel the idea coming on. So no surprise around the holidays, this crazy friend of mine sent me a link to Reboot, a website aimed at getting people to eat more fruits and veggies. Ok it does have a plan that is kind of like a cleanse, but reading through the 15 day plan was actually encouraging. You eat food. Not too much and mostly plants (to quasi-quote Michael Pollen in In Defense of Food). The only issue I have is the protocol for Day 6 through 10. Only juice. No food. No way.

I'm an athlete, I need energy, I've got the need to move. I can't do a 4-day juice stretch even it's supposed to shock my liver into supercharge mode and make my next night out at the pub that much less damaging. I at least need enough to get me through an intense yoga class. So me and this red head friend sat down to try and tweak the reboot to be more sustainable - not surprising coming from the queen of reading recipes and not following them. Same thing here. Reboot offers several recipes for each day. The first salad of Day 1 is an Arugula, Fennel, Avocado Salad, but I came up with this one here. It's more fun, and has an incredible, fresh taste that doesn't leave you feeling like you "only ate a stupid salad".

What I love about this salad is that it's something you would eat as part of a "diet" but it's also something classy and crisp that I'd serve at a dinner party. The smooth avocado and tart dressing are a perfect accompaniment to the crisp and crunchy fennel and radishes. I highly recommend checking out the website, and even if you don't choose to do the whole shabang, it's a good snapshot of what you might need to do if you really want to take a break from the good ole American eating frenzy. Ready, set, reboot!


Blueberry Fennel Salad with Ginger Lime Dressing
Makes: 3-4 servings
Prep time: 10-15 minutes

Ingredients

For the salad
4 cups mixed baby greens (spinach, arugula, watercress, frisee)
1 c. fennel, thinly sliced
3/4 c. blueberries
3/4 c. red cabbage, thinly sliced
4 medium easter radishes (or any other type), thinly sliced
1 small avocado, thinly sliced
2-4 T. fresh dill, chopped
2-4 T. fresh fennel fronds, chopped (optional)

For the dressing
2-3 T. freshly squeezed lime juice (about 1 lime)
1/2 T. rice vinegar
1/2 T. mild tasting oil, such as canola or sunflower (optional)
1/2 T. fresh ginger, minced or grated
1/2 T. agave nectar
1/4 tsp. salt

Directions

To prepare the salad: place greens in a large serving bowl. Layer the remaining fruit and vegetables on top and sprinkle with fresh herbs.

To prepare the dressing: mix all ingredients in a small bowl. To make a low fat dressing, skip the oil and replace with a touch more agave if the dressing is to sour for your taste. Season with salt to taste (beware - too much salt will overpower the freshness of the salad).

To serve: lightly toss the salad with the dress and divide between 3 or 4 bowls.

Friday, January 14, 2011

Quinoa Gratin with Roasted Rutabaga and Spinach

Every time I gear up to write about why I made a particular recipe, my first thought is “I needed to get rid of…” and I’m now starting to think that this is my token kitchen strategy. I used to read through recipes and then buy ingredients for them. Now I buy vegetables because they are aesthetically pleasing and woo me at the market. Then I get home and have to find a way to use them which often translates as “getting rid” of them. (Perhaps I’m not doing them enough justice with my semantics). The other common scenario of “cooking to kitchen cleanse” is dealing with leftovers.

In this case I had overestimated a batch of quinoa, cooking up a whole cup of dried grain. I ended up with a lot of leftovers and though there is usually no problem using up cooked quinoa, I was on a green salad craze last week and didn’t notice the quinoa until it had almost reached expiration. For the first time in a long time, I looked up quinoa recipes.

Quinoa makes a great pilaf and a great filler ingredient in dishes such as fritters and veggie patties. But I didn’t feel like patting cakes and I didn’t feel like going through the fuss of marinating tofu or tempeh as a main dish to go alongside a quinoa pilaf. So I looked for less conventional recipes and found a slew of them for quinoa gratin. My only experience with gratin was in the context of potatoes. Know I understand gratin is more a technique that involves a browned crust, cheese, and eggs. Of course a dish that screams of all things non-vegan is one I must veganize.

Most of the recipes called for 3-5 eggs so clearly the common egg substitutes (applesauce, flax or a flour egg-replacer) were not going to cut it in this dish. It made me think of a quiche-gratin hybrid, though I placed the emphasis to be on the grain, not the “egg” which is of course the overwhelming texture in quiche. This then became more of an omelette project, kind of like Spanish tortilla (which I now think is possible after making this and will attempt soon). The first recipe to come up on my search for “vegan omelette” was of course from the Fat Free Vegan blog and I based my “egg” portion off of Susan’s Vegan Omelette for One. I added a little more moisture and used vegetable broth to make it more savory. This came together beautifully: perfectly golden crust, moist and flavorful filling, with tender bits of sweet rutabaga. The taste was very fancy for how easy it was to prepare.


Quinoa Gratin with Roasted Rutabaga and Spinach
Makes: 2-3 servings
Prep time: 15 minutes
Cook time: 1 hour

Ingredients

1 small rutabaga, cut in 1/2 inch cubes
1 tsp olive oil
Salt & pepper

6 oz. silken tofu (extra firm)
3 T. vegetable broth
3 T nutritional yeast
1 T cornstarch
1 tsp tahini
1/2 tsp salt
1/4 tsp onion powder
1/8 tsp turmeric

1/2 medium onion, chopped
1 large garlic clove, minced
1/2 tsp dried thyme
1/4 tsp dried rosemary
1/2 c. mushrooms, chopped
2 c. spinach
1/4 c. vegetable broth from bouillon
1 1/2 c. cooked quinoa
Salt & pepper

Directions

Preheat oven to 450F.

Coat rutabaga in olive oil and sprinkle generously with salt and pepper. Roast in oven for 30 minutes, turning vegetables half way through to ensure all sides are browned. Remove and set aside.

While rutabaga cooks, prepare the "egg" portion. Combine tofu with next 7 ingredients in a food processor or blender and process until completely smooth. Set aside.

Lower oven to 375F.

Heat a medium skillet over medium-high heat and coat with cooking spray. Add onions and cook until they start to become translucent, 5-6 minutes, spraying onions with more cooking spray if pan becomes too dry. Add garlic, herbs and mushrooms, turning mixture to coat well in spices. Cook another minute until garlic is fragrant. Add spinach and broth and cook until spinach wilts, about 30 seconds. Stir in quinoa, roasted rutabaga, salt and pepper and remove from heat. Transfer to a medium mixing bowl.

Pour the "egg" mixture over quinoa and stir to mix well. Season with additional salt and pepper if desired. Bake in oven for 30 minutes or until gratin is set and the top starts to brown. Remove from oven and let sit 5-10 minutes before scarfing down!

Tuesday, January 11, 2011

Broccoli Cheese Soup

Chilly, dreary weather in AZ is often a welcome change from the norm - typically short-lived but just enough to instill a vague sense of nostalgia for seasonal weather patterns. Last week was colder than usual which set a good stage for curling up with a good book and hot bowl of soup.

I have been making a lot of chunky vegetable soups this winter such as cabbage, lentil, and root vegetable stews – all of which are lovely. But last week, the lack of constant sunshine coupled with the lack of enthusiasm to be at work was really starting to wear on me. I looked out the window to see only clouds and a high of 52 (I know Midwesterners, hush) and thought that chunky vegetable soup just wasn’t going to cut it. Dreaming of warm, comforting food for dinner I started mentally raiding my cupboards for ideas.

The only thing I really wanted to get rid of was a pair of Russet potatoes. I’m more of a sweet potato person, but I had purchased some regular old baking potatoes after getting the stomach flu in order to have a less complex food on hand. But then I got better and the potatoes got lost, so they had to go quickly or they’d sprout right through the counter. The only semi-fun thing I had was broccoli, so I started thinking of what I could do with potatoes and broccoli in the mix. The thought process went something like this.

Baked Potato  >  Loaded Baked Potato  >   CHEEZY loaded baked potato  >  Cheezy Soup  >  Broccoli Cheez Soup!! (poured over Baked Potato)

And so the venture began. I did my customary recipe hunt to get a basic idea of how a vegan might go about making a cheese soup and then branched off on my own. Of course the recipe mirrors the process of making vegan Mac ‘n Cheez or vegan Nacho Cheez, but I wasn’t sure how it would hold up as soup. Turns out, it’s friggin’ yum! My test taster agreed it tastes like the real deal, and I am fairly certain the mustard gives it a certain oompf that is quite necessary to achieve the cheesy taste. While I ended up having the potato on the side, I did transpose the idea of a loaded potato to garnishments for the soup: toasted pine nuts and bac’un bits. So it was more of a loaded soup, but that sounds weird.

Broccoli Cheese Soup
Makes: 2 servings
Prep time: 5 minutes
Cook time: 10 minutes

Ingredients

2 c. broccoli and/or stems, chopped

1 c. vegetable broth from bouillon
1/3 c. nutritional yeast
3 T. flour (potato or all purpose)
1 T. Earth Balance
1 tsp mustard
¼ heaping tsp. onion powder
¼ heaping tsp. garlic powder
¼ tsp. salt
½ - ¾ c. almond milk
Pinch of white pepper

Garnishments (optional): toasted pine nuts, bacon bits

Directions

Steam broccoli for 5-7 minutes or until desired texture is reached. Remove from heat and set aside.

Prepare vegetable broth by boiling water and mixing in a ½ cube of bouillon. Combine next 7 ingredients in a sauce pan and heat over medium-high heat. Whisk in vegetable broth. When soup starts to bubble, lower heat to medium and slowly add in ½ cup of almond milk. Add more if soup is too thick or starchy and. Finish with a pinch of white pepper and stir in broccoli. Top each bowl with a table spoon of pine nuts and/or a dash of bacon bits. Serve with crusty bread or a baked potato.

Thursday, November 11, 2010

Peanut Pumpkin Stew with Caramelized Seitan

Have you ever tried to cook a jack-o-lantern? Or have you ever bought a big ole pumpkin with the intention of carving it for Halloween and then dropped the ball only to be stuck with a 15 useless pounds of vegetable? Make no mistake, there is no turning Jack into pie. I learned that the hard way last year when I had 2 enormous orange faceless heads taking up space in my 1 bedroom apartment. I did get a good batch of seeds from them, and at least I gave their flesh due diligence on the stove (sorry if this sounds like a slasher blog talking about heads and flesh). However, carving pumpkins taste like...well they don't taste like anything. Something that large has a hard time hanging onto it's sugars. Most of us have the opposite problem - the sugars go right to the thighs and never leave. Oh well.

So this weekend I was meandering through the food store who was having a special on pie pumpkins! I was ecstatic about not having to buy canned pumpkin and getting about 2 cans worth for half the price. I got home with my precious pumpkin and stared at it thinking, "now what?" While I love a good pumpkin pie or cookie, those are pretty standard and too simple to do my pumpkin justice. Warm, savory, adventurous - that's what I wanted for my pumpkin's fate. The last savory dish I cooked didn't turn out so well because the recipe I actually followed called for pumpkin puree in a sauce with a bagillion breadcrumbs and something went very wrong, so following a recipe was out of the question. I peeked through a few and some ideas stuck - for some reason my brain was fusing African peanut and African pumpkin stew together so that's what this became. I have no idea if the spices pertain to the appropriate geography, but they worked.

Next time I will most likely serve the caramelized seitan on top of the stew and garnish with cilantro. I didn't have any cilantro on hand but it would have been nice for some color. I'm crazy and made my own seitan and Worcestershire (vegan of course) but store bought version would be fine, though I highly recommend making your own Worcestershire sauce with any recipes sans anchovies for the best results. I served this with a skillet cornbread that I have yet to perfect, but it was damn good.


Peanut Pumpkin Stew
Makes 3-4 servings
Cook time: 1 hour

Ingredients

1 jalapeno
1/2 T. canola oil
1 small onion, chopped
2 T. garlic, minced (4-5 cloves)
1 1/2 T. fresh ginger, minced
1/2 tsp. cumin, ground
1/4 tsp. garam masala
1/4 tsp. turmeric
1/2 small pumpkin, peeled and cubed
1/2 red bell pepper, sliced
1 can diced tomatoes
2 c. vegetable broth from bouillon
2 T. peanut butter
1 c. Caramelized Seitan (recipe below)
1/4 c. roasted peanuts
Salt and cayenne pepper to taste
Cilantro for garnish (optional)

Directions

Broil whole jalapeno on high and cook until skin is blackened and blistered, rotating periodically to make sure all sides are heated. Remove from heat and let cool. Split the pepper open, remove the seeds, and chop into small pieces (wear gloves or hold the jalapeno with a fork/tongs and spoon out the seeds without touching with your fingers). Set aside.

In a medium stock pot, heat the canola oil over medium heat. Add onion and cook until golden brown stirring frequently, about 10 minutes. Add garlic, ginger, and half of roasted jalapeno (reserve other half for another use or throw in and brace yourself). Stir until garlic and ginger become fragrant, about 30 seconds, and add the rest of the spices plus a pinch of salt. Cook another minute until spices are aromatic and throw in the pumpkin and bell pepper. Stir to coat with spices and cook until pumpkin starts to become tender, about 7-8 minutes. Add tomatoes with juices and increase heat to high. When mixture starts to boil, add vegetable broth. Bring stew to a boil and reduce heat to medium-low. Let stew simmer at a low boil for 20-30 minutes.

When pumpkin is very tender and breaks apart easily, stir to mash some of the pumpkin and thicken the stew. Add the peanut butter and stir to blend completely. Add Caramelized Seitan and peanuts (you can either add this into the stew or place on top when service). Season with salt and a little pinch of cayenne pepper if there's not enough heat for you. You can also soften the spice and bring out the peanut flavor with a small pinch of sugar. Garnish with cilantro if desired.


Caramelized Seitan
Makes about 1 cup
Prep time: 30 minutes
Cook time: 10 minutes

Ingredients

2-3 T. Worcestershire sauce
1/2 c. water
1-2 T. sherry or other sweet wine
1 c. homemade or store bough seitan, cubed
Cooking spray

Directions

Whisk all marinade ingredients together and marinate seitan for at least 30 minutes (while you prep the stew or while it's cooking). Drain the seitan reserving the marinade.

Heat a skillet or stove top wok over high heat. When hot coat with cooking spray and throw in the seitan. Reduce the heat only slightly, when the pan starts to dry and seitan browns, pour in 1/4 cup of the marinade. Let reduce until thick and sticky. Scrape the skillet to rotate the seitan and pour in more marinade. When seitan is brown on all sides pour in any remaining marinade and turn off the heat. Remove from heat when there is still a small amount of thick marinade coating the seitan.